Ec2 Instance Connect Endpoint
What is an EC2 Instance Connect Endpoint?
EC2 Instance Connect endpoint now allows you to connect to a Windows or Linux Amazon EC2 instance in a private subnet via SSH or RDP without the need for using SSH keys (if using EC2 Connect via the browser, you’ll still need SSH keys if using the CLI), or needing a public IP address for the EC2 instance.
This will remove the cost of having to pay for a public ipv4 address come February 1, 2024, help alleviate some of the issues of ipv4 address space allocation exhaustion (this example is only one of several ways), and improve security by utilising IAM policies for granular acess control to your EC2 instances. You can harden IAM policies for example to only allow access from a specific IP range, to specific instnaces based on tagging and more. (Note that ipv6 is not supppoted).
The EC2 Instance Connect service endpoint is reachable over the internet or over an AWS Direct Connect public virtual interface.
Below is the high level architecture (from AWS’ official documentation):
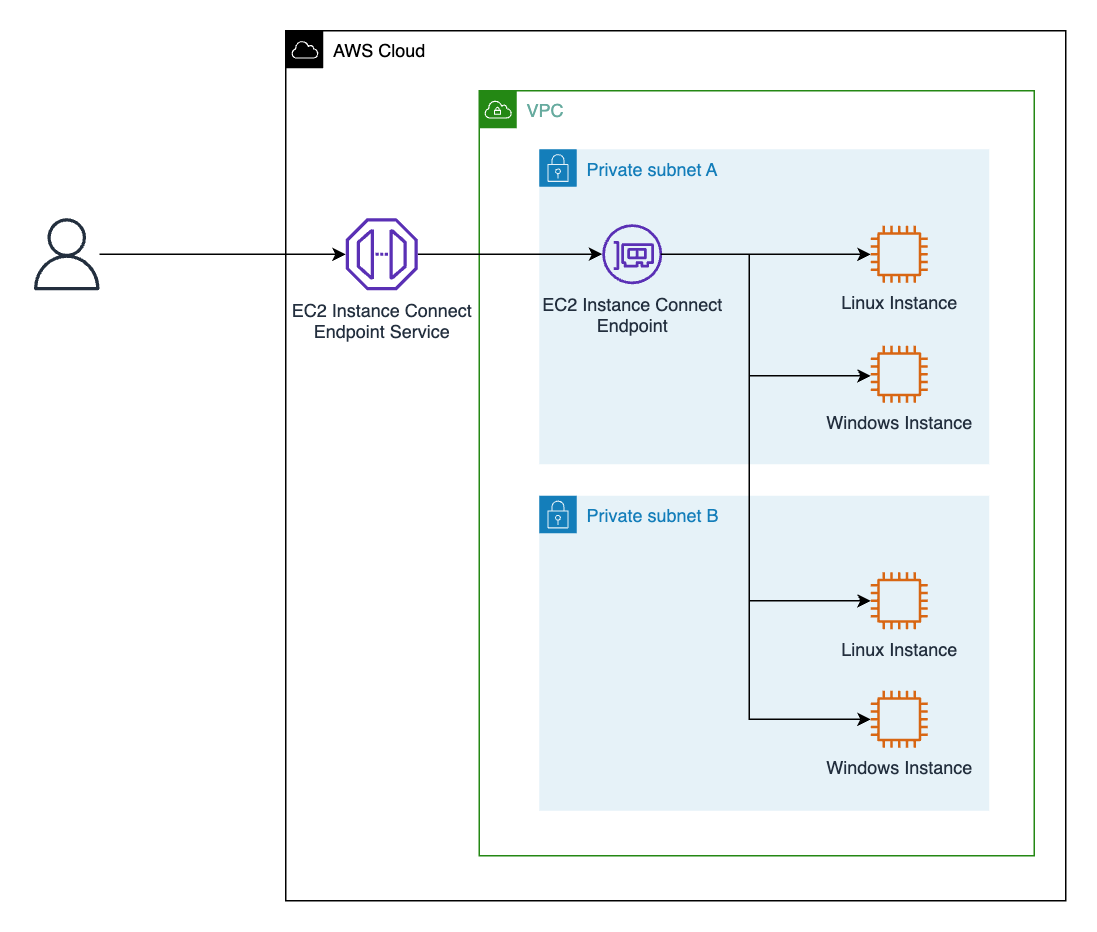
In this example we’ll implement a simple single Linux EC2 only for demonstration purposes. This guide assumes you’ve got an existing running EC2 instance(s). In this example we’ve already got an Amazon Linux 2 AMI, depoyed as by default they already have the AWS EC2 Instance Connect package installed for us.
Step 1 - Create your EC2 Instance Connect Endpoint and Security Group
Note: you have to reference an existing security group to your endpoint when you create it, but the way you need to reference the rule for the security group means you need to have the instnace endpoint created first. So you will be jumping back and forth a bit here.
Create the EC2 Instance Connect Endpoint
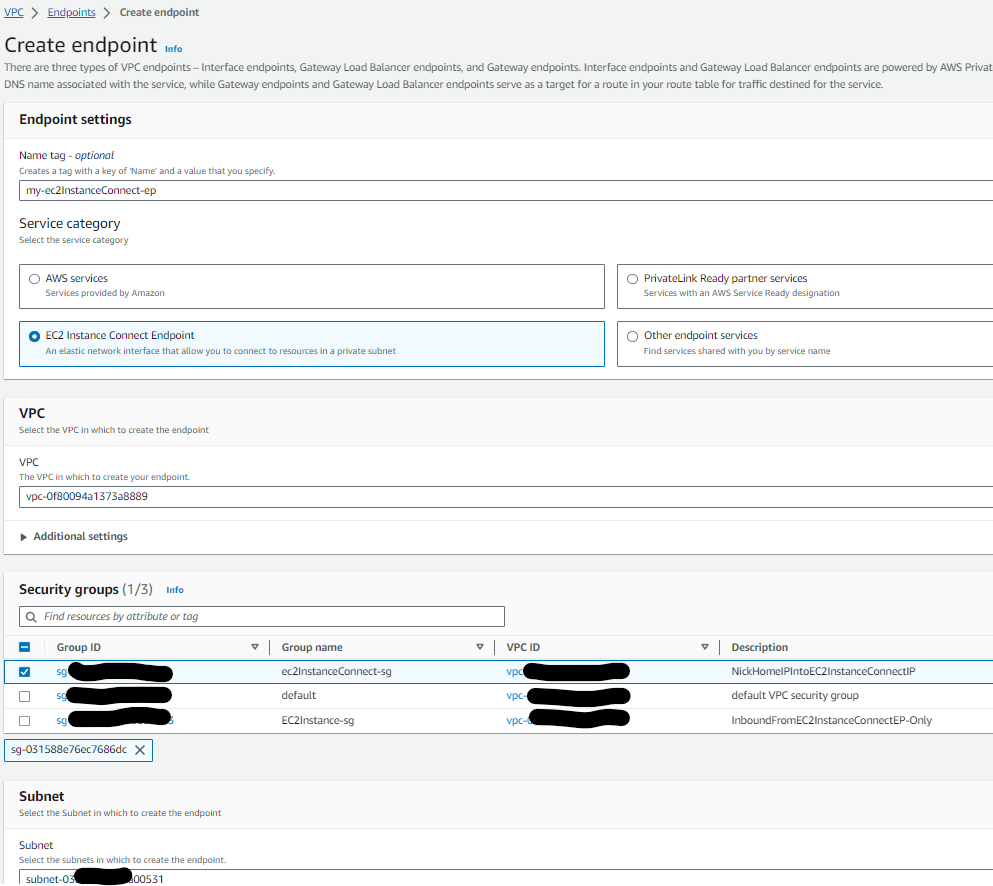
In the AWS console, click on VPC > Endpoints > and create a new EC2 Instnace Connect Endpoint with a meaningful name. Take note of the VPC and private subnet into which you’re deploying your Endpoint, as you’ll need to have the EC2 instance deployed in the same subnet and VPC later:
Wait a few minutes while your new EC2 instance connect endpoint is being provisioned. Once successfully provisioned, create a new Security Group to assign to the endpoint and set it up similarily to how we did for the EC2 instnace itself. (My Example shows this seurity group already created and assigned to the instance):
Create the EC2 Instance Connect Endpoint Security Group
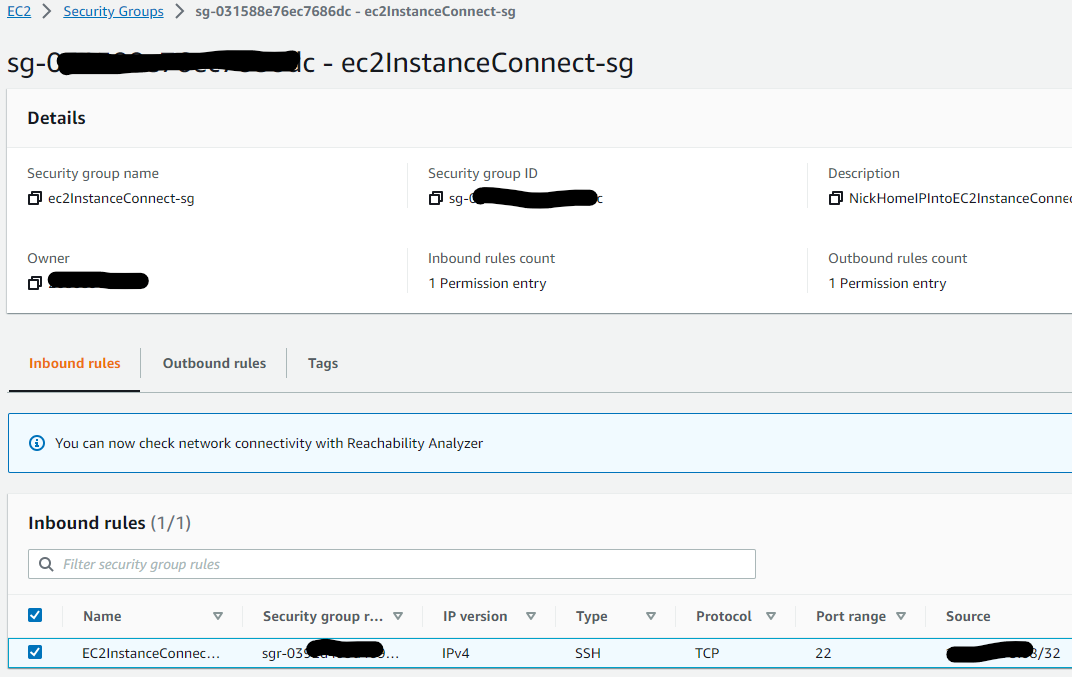
For this example, the security group rules we only want to allow traffic of type TCP (for SSH into my Linux EC2 instance) incoming from your home IP address CIDR range into your EC2 Instance Connect Endpoint. This lowers the blast radius significantly, and is a AWS Well-Architected practise. It also helps simplify security group rulesets as you can reference nested security groups, rather than controlling fragemented specific ports/rules.
Here’s what my security group looks like for reference. It allows all traffic outbound, and allows only inbound SSH connections from my home IP address:
Step 2 - Configure your IAM role, create and attach your IAM policy
More information on the permissions required can be found here
Create an EC2 Instance Connect Endpoint IAM role
Let’s browse to the IAM console, Browse to IAM > Roles and click create. Give the role a meaninful name.
Create an IAM policy to link to the IAM role
Now - let’s write an IAM policy and attach it to our EC2 Instnace Connect IAM role. I’m going to give an example of how you could do this. Your needs may vary. This example policy below restrics access to my home IP address IP, and allows me to connect to a single specific EC2 instance in my AWS account.
As I mentioned earlier you can tighten or loosen up policies based on your needs. Tagging instances is a great way to allow for example your developers to SSH into your ‘DEV’ environment EC2 instances only, and only orginating via your corporate IP range/VPN address.
Click ‘IAM’>‘Create Policy’ > ‘json’ and give your policy a meaninfgul name. Below is my policy for reference that you can adapt to your needs:
{
    "Version": "2012-10-17",
    "Statement": [{
            "Effect": "Allow",
            "Action": [
                "ec2:DescribeInstances",
                "ec2:DescribeInstanceConnectEndpoints"
            ],
            "Resource": "*"
        },
        {
            "Effect": "Allow",
            "Action": "ec2-instance-connect:OpenTunnel",
            "Resource": "arn:aws:ec2:region:account-id:instance-connect-endpoint/eice-123456789abcdef",
            "Condition": {
                "IpAddress": {
                    "aws:SourceIp": "192.0.2.0/24"
                },
                "NumericEquals": {
                    "ec2-instance-connect:remotePort": "22"
                }
            }
        }
    ]
}
Attach your IAM policy you’ve created to your IAM role for use in the next step where you’ll need your IAM policy attached to your EC2 instance:

Afterwards, you should see something like:

Step3 - Configure your EC2 Security Group
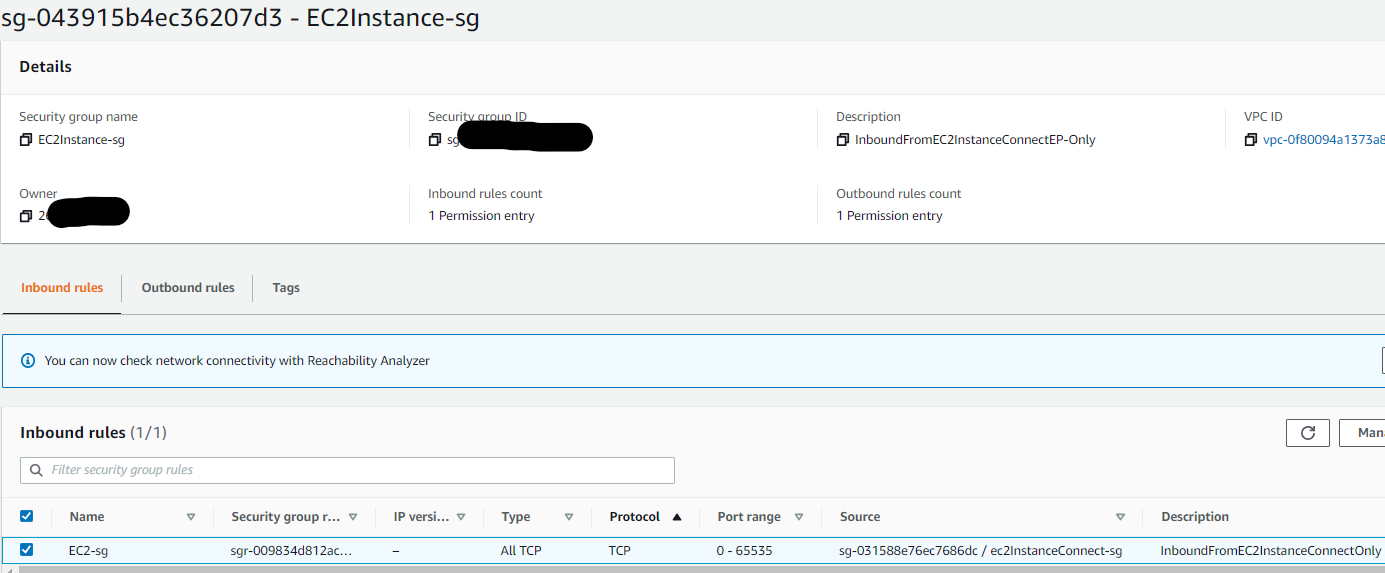
For the security group rules we only want to allow traffic of type TCP incoming from the security group assigned to your EC2 Instance Connect Endpoint. This lowers the blast radius significantly, and is a well-architected practise as it only allows incoming traffic coming via your EC2 Instnace Connect Endpoint. It also helps simplify security group rulesets as you can reference nested security groups, rather than controlling fragemented specific ports/rules.
Here’s what my security group looks like for reference. It allows all traffic outbound, and allows only inbound connections from the security group ID of the security group assigned to my EC2 instance connect endpoint:
Check over
Right so now we should have:
- Linux AWS Linux 2 AMI EC2 instance
- IAM role and IAM policy for EC2 instance connect
- EC2 Instance Connect Endpoint
- Security group for EC2 Instance Connect Endpoint
- Security group for EC2 Instance
Step 4 - Connecting to your EC2 instance connect endpoint
Browser Console
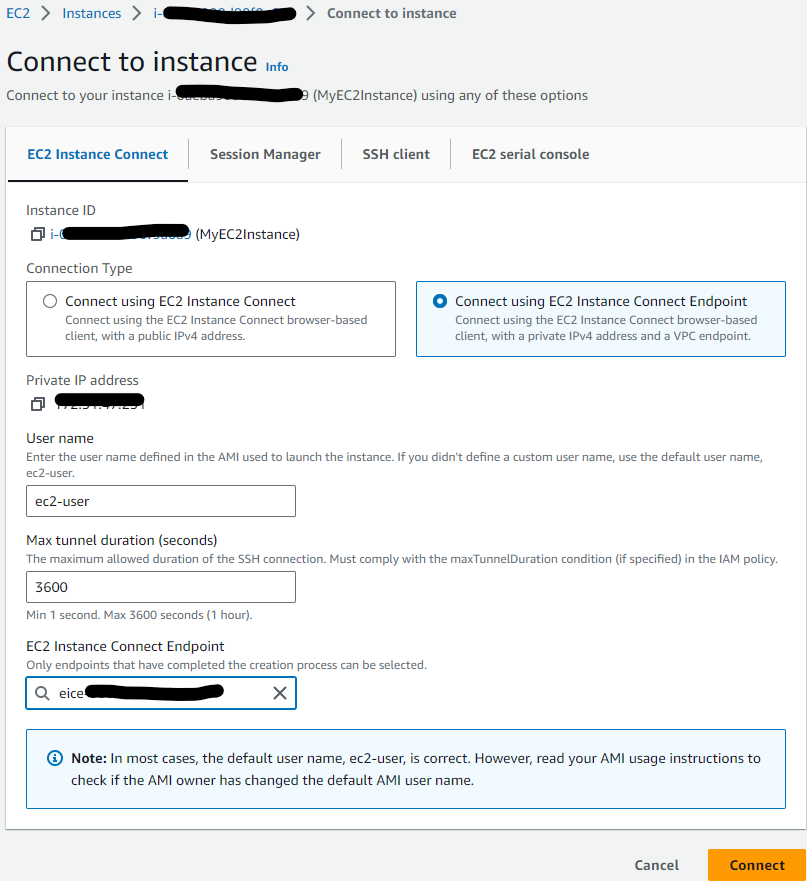
Click on ‘Connect’ when you’ve got your EC2 instance selected, and select the following options and find your endpoint:
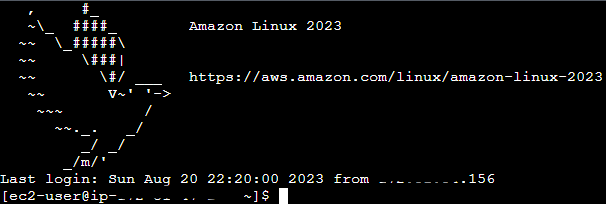
Now we’ve succesfully logged into our EC2 instance in a private subnet, with no public IP address:
SSH Client
Assuming you’ve got your SSH keypair for your EC2 instance saved locally in ~/.ssh with your other keys and you’ve run chmod400 on the key, you should be good to go for the next step.
Open up your terminal and run the following to SSH into your instance:
ssh -i my-key-pair.pem ec2-user@i-0123456789example \
    -o ProxyCommand='aws ec2-instance-connect open-tunnel --instance-id i-0123456789example'
Summary
That’s it. Hopefully that helps explain a newer feature for EC2 Instance Connect. It’s a great way to provide access to EC2 instances without the need for a public IPV4 address, and allows you to manage granular acccess via IAM, and therefore improving your overall security posture in the AWS landscape.